

How to install a Pipe Blind Flange on a small - diameter pipeline?
Nov 11, 2025
Installing a pipe blind flange on a small - diameter pipeline is a task that requires precision, knowledge, and the right tools. As a supplier of high - quality pipe blind flanges, I've witnessed firsthand the importance of a proper installation process. In this blog, I'll guide you through the steps of installing a pipe blind flange on a small - diameter pipeline, ensuring that you achieve a secure and leak - free connection.
Understanding Pipe Blind Flanges
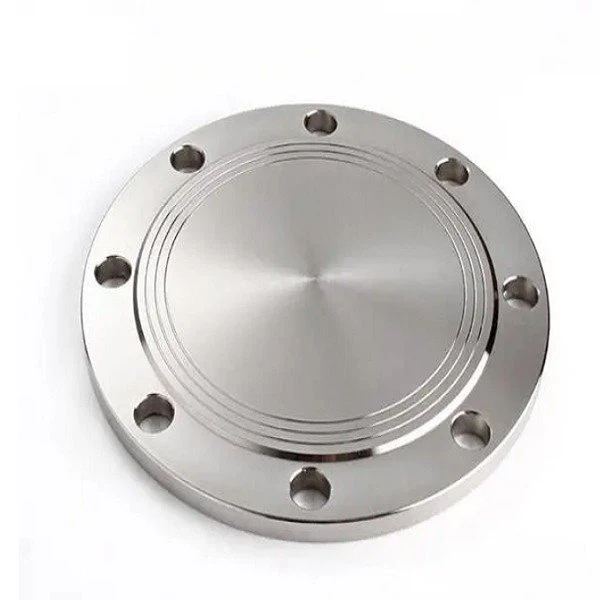
Before we dive into the installation process, let's briefly understand what a pipe blind flange is. A pipe blind flange is a solid disk used to seal the end of a pipe. It's commonly used to block the flow of fluid or gas in a pipeline, allowing for maintenance, inspection, or modification without having to remove an entire section of the pipe. There are different types of pipe blind flanges, such as Stainless Steel Forged RF Blind Flange, which are made from high - quality stainless steel and offer excellent corrosion resistance, and Slip Blind, which slides over the pipe and is then welded in place.

Tools and Materials Needed
To install a pipe blind flange on a small - diameter pipeline, you'll need the following tools and materials:
- Pipe Blind Flange: Choose the appropriate size and type of Pipe Blind Flange for your pipeline. Make sure it meets the required pressure and temperature ratings.
- Gasket: A gasket is used to create a seal between the flange and the pipe. Select a gasket material that is compatible with the fluid or gas in the pipeline and the operating conditions.
- Bolts and Nuts: Use high - strength bolts and nuts that are the correct size and grade for your flange.
- Wrenches: You'll need a set of wrenches to tighten the bolts and nuts.
- Measuring Tools: A tape measure or caliper to ensure the proper alignment and fit of the flange.
- Cleaning Tools: A wire brush or sandpaper to clean the mating surfaces of the flange and the pipe.
- Safety Equipment: Safety glasses, gloves, and a hard hat to protect yourself during the installation process.
Step - by - Step Installation Process
Step 1: Prepare the Pipeline
- First, shut off the flow of fluid or gas in the pipeline. This is crucial for safety reasons and to prevent any leaks during the installation process.
- Drain the pipeline to remove any remaining fluid. Make sure to follow proper safety procedures when draining the pipeline, especially if the fluid is hazardous.
- Use a wire brush or sandpaper to clean the end of the pipeline. Remove any rust, dirt, or debris from the mating surface. A clean surface is essential for a good seal between the flange and the pipe.
Step 2: Prepare the Blind Flange
- Inspect the blind flange for any damage or defects. Check the surface for scratches, cracks, or unevenness. If any issues are found, replace the flange.
- Clean the mating surface of the blind flange using a wire brush or sandpaper. Similar to the pipeline, a clean surface will ensure a proper seal.
- Place the gasket on the mating surface of the blind flange. Make sure the gasket is centered and aligned properly.
Step 3: Align the Flange
- Carefully position the blind flange over the end of the pipeline. Use a measuring tool to ensure that the flange is centered and aligned correctly. The holes in the flange should match the holes in the pipeline.
- Insert the bolts through the holes in the flange and the pipeline. Make sure the bolts are inserted from the same side of the flange to ensure even tightening.
Step 4: Tighten the Bolts
- Start by hand - tightening the nuts on the bolts. This will help to hold the flange in place while you begin the final tightening process.
- Use a wrench to tighten the nuts in a criss - cross pattern. This will ensure that the flange is tightened evenly and prevent any distortion. Tighten the bolts gradually, in small increments, to avoid over - tightening.
- Refer to the manufacturer's specifications for the recommended torque value for the bolts. Using a torque wrench can help you achieve the correct torque and ensure a proper seal.
Step 5: Check for Leaks
- Once the bolts are tightened, turn on the flow of fluid or gas in the pipeline. Check for any leaks around the flange. If you notice any leaks, stop the flow immediately and retighten the bolts.
- Inspect the gasket for any signs of damage or misalignment. If the gasket is damaged, replace it and repeat the installation process.
Tips for a Successful Installation
- Proper Alignment: Ensuring the correct alignment of the flange and the pipeline is crucial. Misalignment can lead to leaks and premature failure of the flange.
- Torque Control: Over - tightening or under - tightening the bolts can cause problems. Always follow the manufacturer's recommended torque values.
- Gasket Selection: Choose a gasket material that is compatible with the fluid or gas in the pipeline and the operating conditions. A wrong gasket selection can lead to leaks and corrosion.
- Regular Maintenance: After the installation, regularly inspect the flange for any signs of wear, corrosion, or damage. Replace any worn or damaged parts as needed.
Conclusion
Installing a pipe blind flange on a small - diameter pipeline is a task that requires attention to detail and the right techniques. By following the steps outlined in this blog, you can ensure a secure and leak - free installation. As a supplier of high - quality pipe blind flanges, we offer a wide range of products to meet your specific needs. If you have any questions about our products or need assistance with the installation process, please don't hesitate to contact us for procurement and further discussions.
References
- "Piping Handbook" by Cameron Engineering and Associates
- Manufacturer's installation guides for pipe blind flanges